First Steps
This tutorial gives you a brief overview of the general WordPress and Warp framework setup.
Assign Widget Positions
When you have existing content in your Wordpress installation, activating your theme will most likely make your site look a little weird. The reason for that are Widgets that are assigned to default positions that don't fit with the theme. We can improve that by assigning them to better positions available in our theme.
Navigate to Appearance » Widgets. As a first step, you might want to drag most widgets to the Disabled Widgets position. In our example, those widgets are located in the Search position. We'll remove all widgets here except for the actual Search widget.
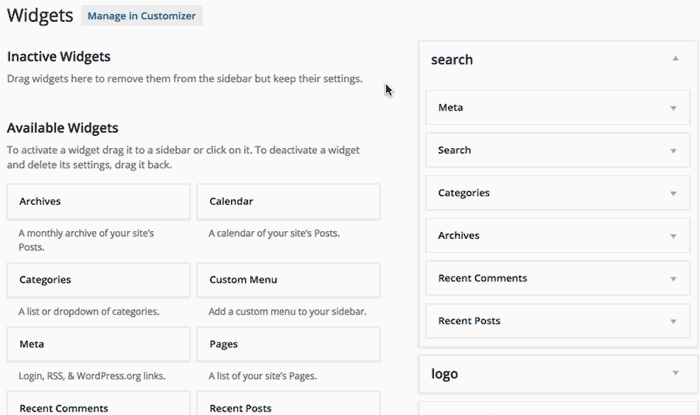
Check your site, it should look less cluttered now. From this state on you can now assign widgets to the several available positions in your theme. For an overview of all widget positions in your theme, check the Features » Layouts page of the theme in our online demo installations.
Setup the Menus
To tell your theme what should be rendered as your main navigation, we need to setup a menu in Wordpress and assign it as our main navigation.
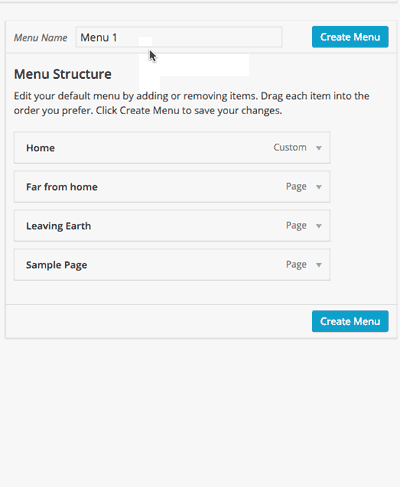
First of all, you need to create a new menu and add your menu items. For detailed instructions, see the WordPress documentation. In this example we add all existing pages by default and remove one that we do not want.
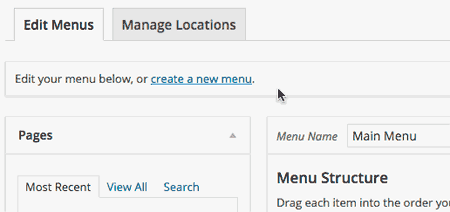
Now we just need to select the freshly created menu to be used as the main navigation on our site. Hit the Manage locations tab on the top and select the menu from the dropdown.
Menu on Small Devices
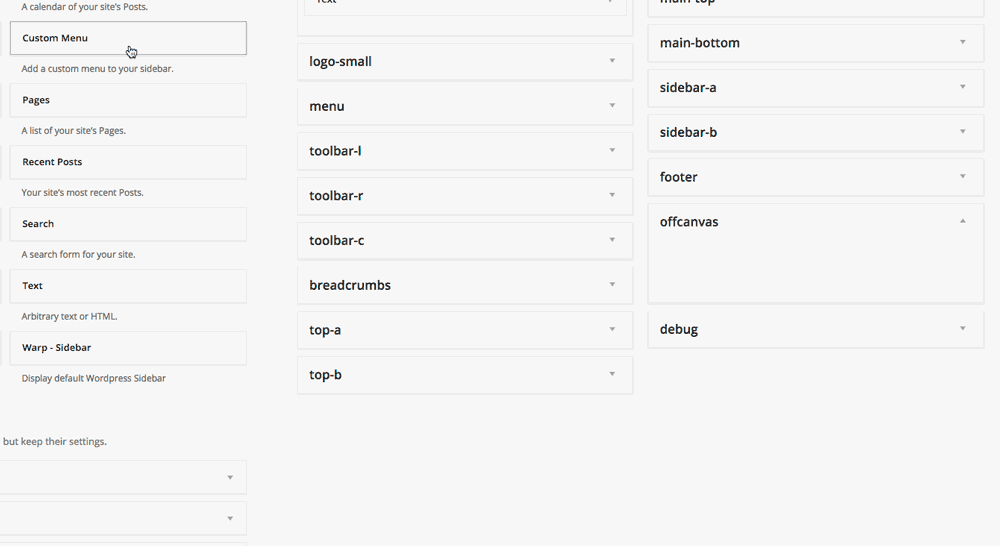
The default menu will be hidden on small devices. You can and should use the offcanvas position to have a mobile friendly version of your menu. The offcanvas element can be toggled from a menu icon. You can also publish other widgets in this position, but a menu is the most likely thing you'll want in any case.
Menus in Any Position
You can create any number of menus you like and publish them as a Custom Menu widget in the Widget area of the Wordpress backend. You can assign that widget to any position you like.
Menu Styles
There are three different menu styles, the Navbar and its mega dropdown as a main menu, the Navs with the accordion effect in sidebars and the Subnavs in the toolbar or footer. Warp automatically styles the menu according to its module position.
Setup the Logo
Setting up the logo in WordPress is pretty straightforward. Just create a Text widget in the Logo position. Now you can edit your widget and enter your markup.
For example, use the following code:
<img src="images/logo.png" width="200" height="50" alt="logo" />
Warp 7 also provides the logo-small position, where you can display an alternative logo image for smaller viewport sizes.
Note If the logo image is not visible on all pages, just add a leading slash before the image path, e.g.: /wp-content/uploads/logo.png.
![]()