Widgets
In this tutorial you'll learn how to create widgets and get an insight of the general structure of Widgetkit.
Open Widgetkit
After you've installed Widgetkit, it will be available from the backend of your CMS. Both in Joomla and WordPress, Widgetkit adds its own administration interface where you can create new Widgets and manage existing ones.
In Joomla, the Widgetkit administration can be accessed from Components » Widgetkit. In WordPress, you can find the same interface under the Widgetkit section in the backend navigation.
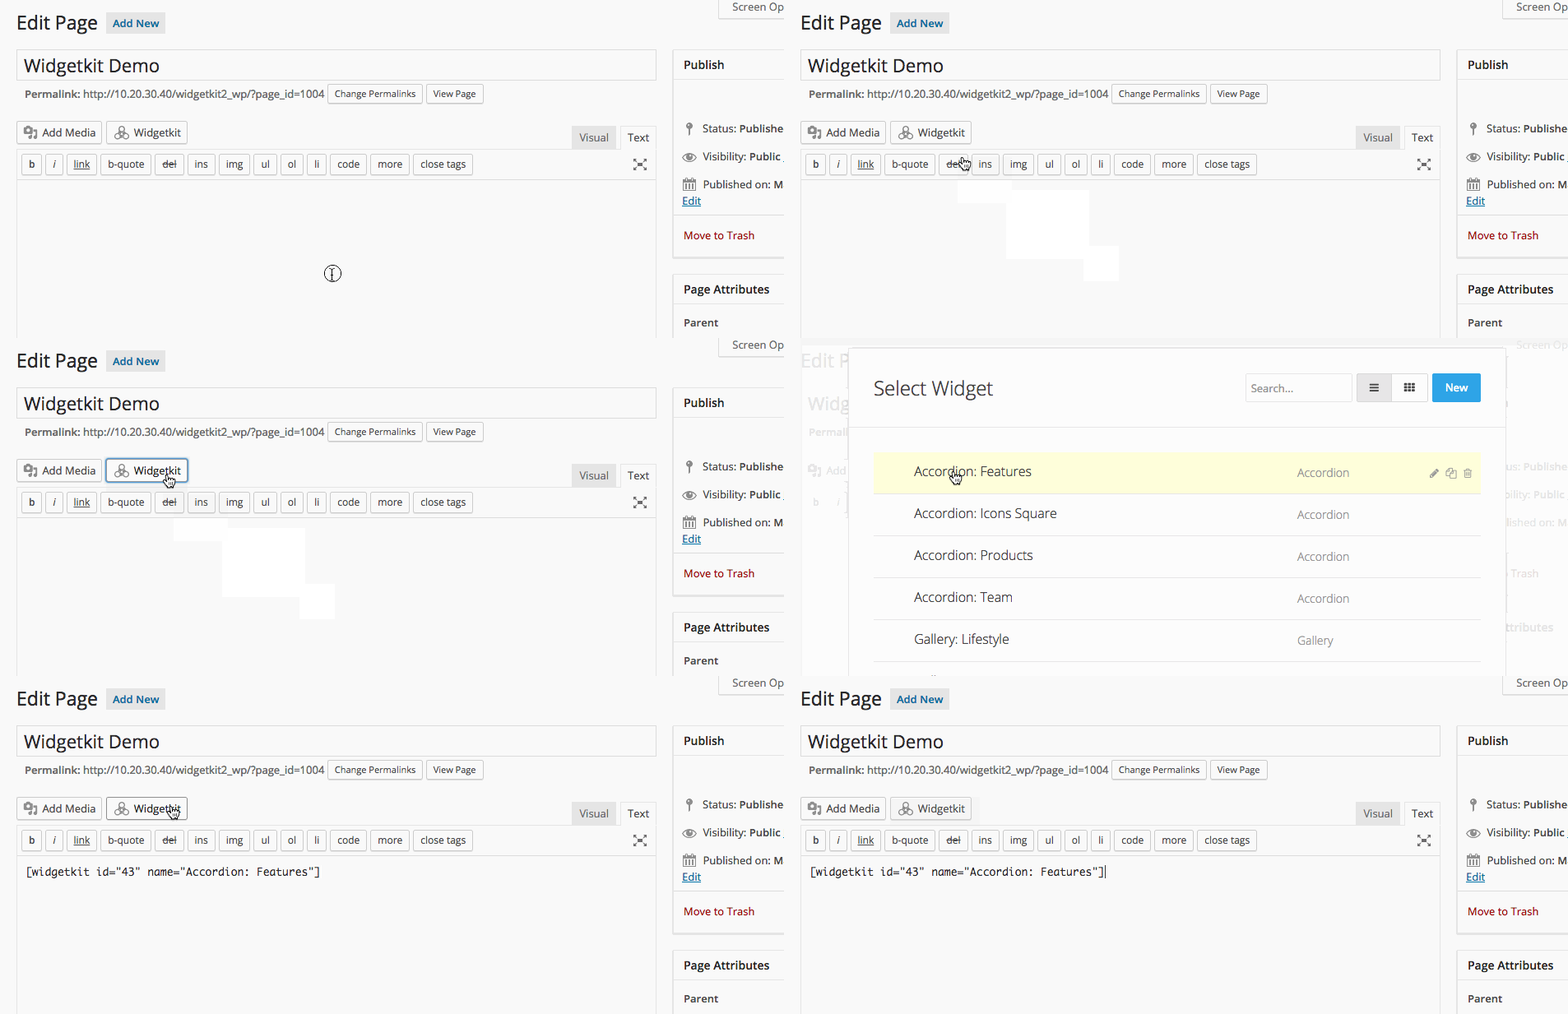
In addition to the stand alone interface, you can also use Widgetkit inside a lightbox right from your content. Inside an article or component, you can click the Widgetkit button to open the Widgetkit lightbox. All settings and options from the stand alone interface are available in this editor as well.
Create a New Widget
In order to create a new widget or insert an existing one, follow these steps:
- Inside the editor of your CMS hit the Widgetkit button. This will open Widgetkit in a lightbox.
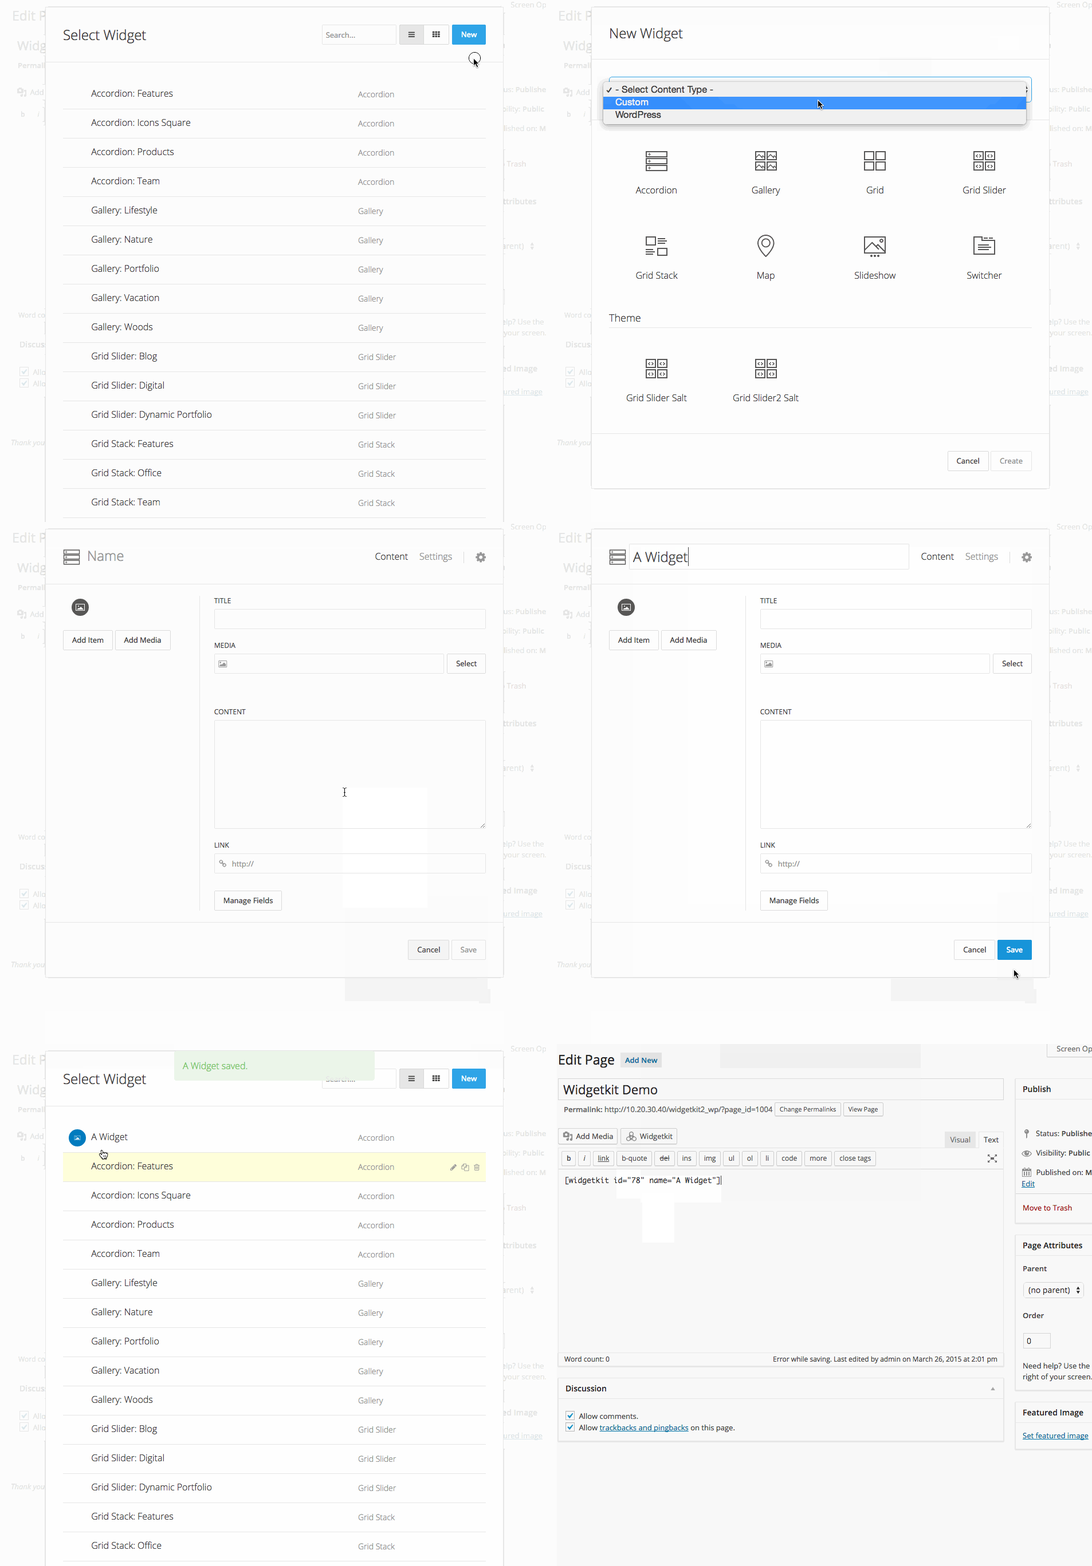
- Insert one of the already existing widgets from the list by clicking inside the widget title or hit the New button to create a new widget. You can also edit, duplicate or delete single widgets by clicking the icons that appear on the right hand side when hovering an item.
- To create a new widget, choose the content type and pick the widget you want to be rendered. For more information, take a look at the Widget Plugins documentation. Afterwards hit Create to proceed.
- Enter a name for your widget and start adding your content. For more information, check out the Content Provider documentation. In the Settings panel you can change the configurations of the widget plugin, like animations and display options or add a custom class to your widget. To change the content type or widget plugin click on the gear icon.
- Hit Save to finalize your widget. Then hit Cancel and you will be taken back to the list of widgets, where your newly created widget will appear. Click inside the widget title to insert the shortcode into your content.

Using Shortcodes
Shortcodes are a very popular concept from WordPress which allows you to easily publish dynamic content without any programming knowledge. Basically you insert a shortcode in a WordPress post or Joomla article, and it will be rendered as a widget, for example a slideshow which loads dynamic content from your CMS.
All shortcodes include the id and the title of the widget that you want to display.
[widgetkit id="1" name="My Slideshow"]
If you want to edit your widget afterwards, you need to click inside the shortcode before hitting the Widgetkit button. Otherwise, you can only create a new widget.

Using a WordPress Widget or Joomla Module
Widgetkit also provides a WordPress Widget or Joomla module. In WordPress, go to Appearance » Widgets and drag and drop the Widgetkit widget to any theme position. In Joomla, create a new Module in the Module Manager and select Widgetkit as the Module Type. The editor will then display a Select Widget button which opens the Widgetkit dialog.