WordPress Multisite
Multisite is a feature of WordPress that allows multiple virtual sites to share a single WordPress installation. You can add as many sites as you like and use Widgetkit on every one of them.
Installation
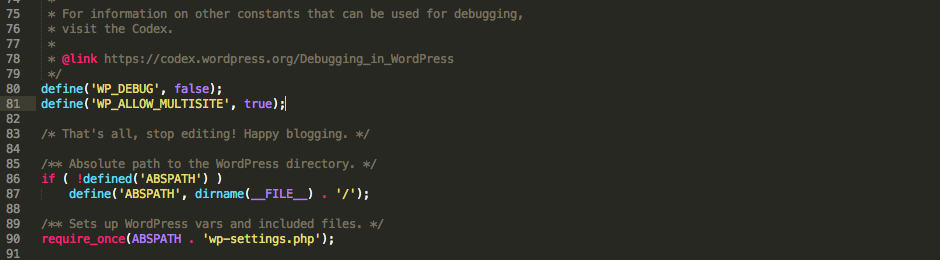
First you need to activate the Multisite in WordPress. To do so, access your site's root via FTP and open the file wp-config.php. Look for the line:
/* That's all, stop editing! Happy blogging. */
and add the following code above it:
define('WP_ALLOW_MULTISITE', true);
It should look like this:
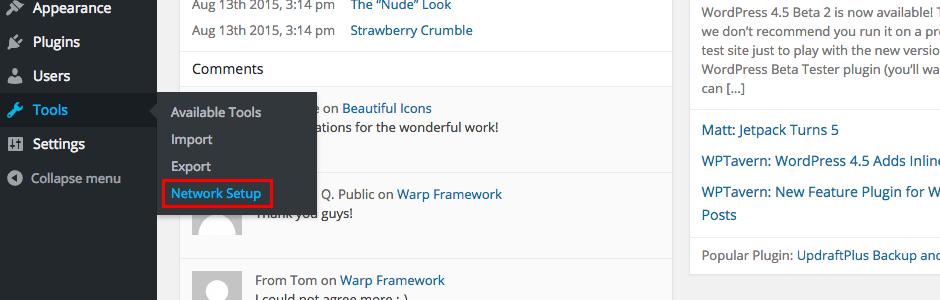
Go back to your WordPress Dashboard and deactivate every plugin you have. Then go to Tools -> Network Setup and follow the instructions.
For a complete instruction on how to install a Multisite please have a look at the WordPress documentation: Create a Multisite
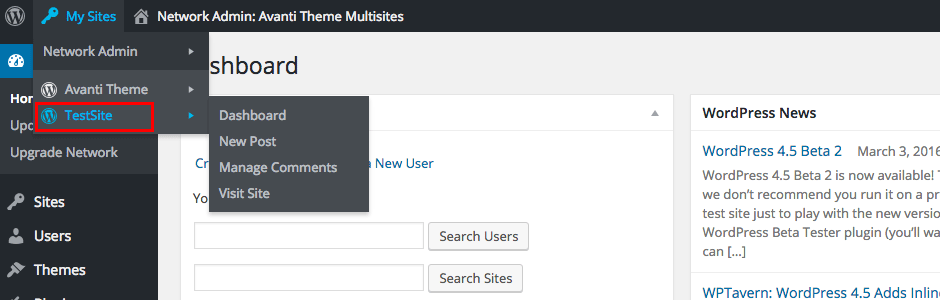
After you’ve added the code snippets to your wp-config.php and .htaccess file, reload the page and log yourself back in. Now you’ve installed the Multisite. Create a new Site by going to Sites -> Add new.
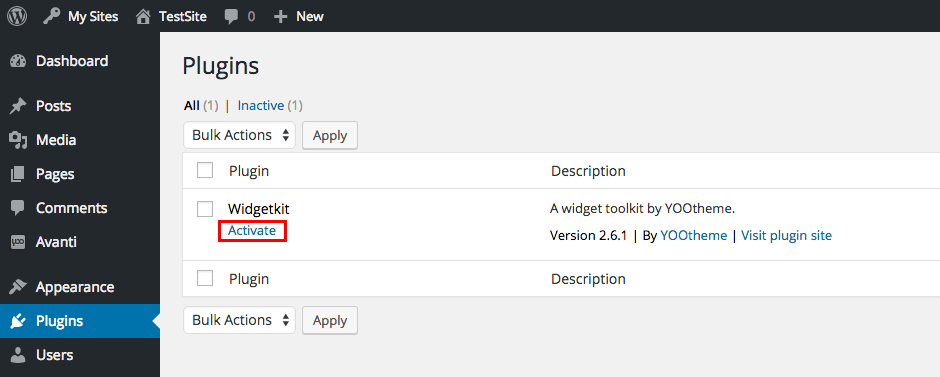
To activate Widgetkit on your sites, you can not use the Network Activate Bulk Action. Widgetkit needs its own database within the Multisites, so you’ll have to manually activate Widgetkit on every site.
Go to every Site you've installed and activate Widgetkit.
There you go. Now you can create widgets with Widgetkit on every Multisite.
Insufficient User Rights
If you get the Error Message Insufficient User Rights, you activated Widgetkit in your Network Admin via the Bulk Option Network Activate. This does not work with Widgetkit. Deactivate Widgetkit in your Network Admin and go to your Multisite. Click on Plugins and activate Widgetkit right there for every site.
Widgets Don't Save
This can happen if you activate Widgetkit as the Network Admin. Deactivate Widgetkit and go to every Multisite you created to activate Widgetkit one by one.