Dynamic Content
Load dynamic content into your layouts and create site-wide templates for categories, tags, user and posts using the YOOtheme Pro page builder.
YOOtheme Pro allows you to load content, which is managed in WordPress, from the database into your layouts. This can be the post's title or featured image. Whenever that content changes, it will be automatically updated across your entire website. This is not limited to post fields. Any content from WordPress can be loaded into your layouts.
Content Sources
All builder elements are able to load dynamic content. First, you need to select a content source which defines fields available for mapping. It can be selected in the Advanced tab of an element under Dynamic Content.
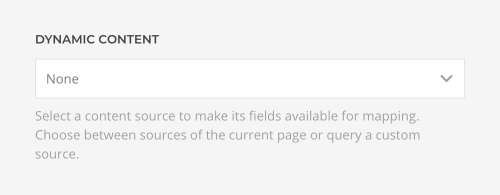
For elements which have multiple content items, for example the Grid or the Slideshow element, the Dynamic Content option can be found in the Advanced tab of each item as well as the element itself. This way each item can have a different content source.
The options under Dynamic Content are grouped depending on where the source comes from.
| Type | Description |
|---|---|
| Page | Content sources which are provided by the page you are browsing. On a single post page, it's the post itself, and on the category page, it's the category itself and its posts. |
| Custom | Content sources which are custom queried and independent of the current page. For example, you can load the latest posts or all blog categories into a page. |
| External | External sources which are custom queried and not part of the WordPress database. For example, you can load images from a specific folder into a page. |
| Site | A content source with general fields of your site, fields of the current logged in user as well as fields of the HTTP request like the URL. |
| Parent | Content sources set on the closest parent node, for example an element, column, row or section. |
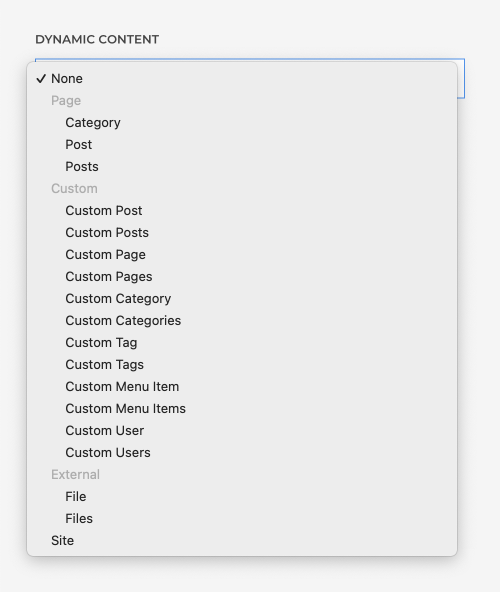
In general, a content source can be Pages, Posts, Categories, Tags, Menu Items Users or Files as well as any custom post type or taxonomy.
YOOtheme Pro also differentiates between a single item source or a multiple items source. An element which loads a single item source will only be rendered one time. An element which loads a multiple item source will be multiplied and rendered as many times as available in the content source.
In addition, a source can have related content sources, for example the post author or tags.
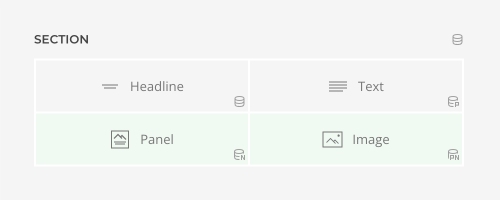
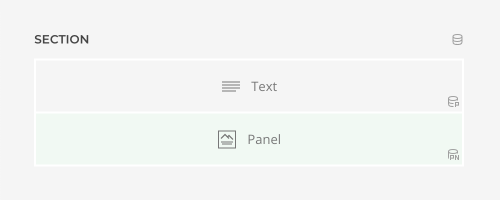
Sections, rows, columns or elements which load dynamic content show a dynamic content status icon. The n status icon indicates that the used source is a multiple items source, the p status icon indicates that it is a parent source.
Page Sources
Depending on the page you are browsing WordPress provides different content sources. These sources are used when creating templates for those pages. For example, the template for the single post page will render different post content depending on which singe post you are browsing.
Here is an overview of all supported pages and their content sources.
| Page | Sources |
|---|---|
| Single Page | The Page itself, its Previous Page and Next Page |
| Single Post | The Post itself, its Previous Page and Next Page |
| Posts Archive | All Posts |
| Category Archive | The Category itself with all its Posts and their Tags |
| Tag Archive | The Tag itself and all its Posts |
| Author Archive | The Author and all author's Posts |
| Date Archive | The Date itself and all Posts from that date |
| Search | The Search itself and all found Items. Filter items visually by the selected post types. |
All page sources which have multiple items are also available as a single item source which allows loading their related multiple items sources.
Note The Previous Post and Next Post sources additionally have an option to only load posts from the same term.
Note Pages with a Posts source are usually divided into separate pages. The number of posts displayed per page can be set under Blog pages show at most in the Reading Settings in WordPress.
Custom Sources
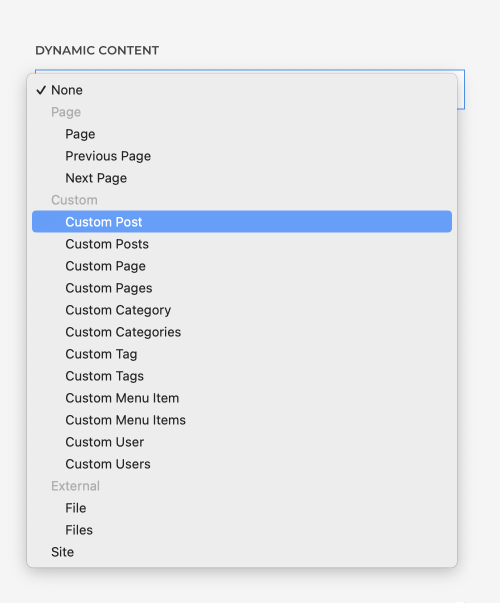
Custom sources allow you to load custom queried content which is not automatically available on the page you are browsing. For example, you can load the latest posts or all blog categories into a page. Unlike page sources, custom sources are not divided into separate paginated pages.
Following custom sources are available.
| Source | Type | Description |
|---|---|---|
| Custom Post | Single | Manually select a post or use filter options to specify which post should be loaded dynamically. Filter posts by terms or users. Use the shift or ctrl/cmd key to select multiple terms or users. Select whether to exclude child terms, include them or only include child terms. Set the logical operator for each taxonomy to match at least one of the terms, none of the terms or all terms. |
| Custom Posts | Multiple | Filter posts by terms or users. Use the shift or ctrl/cmd key to select multiple terms or users. Select whether to exclude child terms, include them or only include child terms. Set the logical operator to match at least one of the terms, none of the terms or all terms. |
| Custom Page | Single | Manually select a page or load a page by setting the offset. |
| Custom Pages | Multiple | Load all pages. |
| Custom Category | Single | Manually select a category. |
| Custom Categories | Multiple | Categories are only loaded from the selected parent category. |
| Custom Tag | Single | Manually select a tag. |
| Custom Tags | Multiple | Load all tags. |
| Custom Menu Item | Single | Select a menu item from the selected menu. |
| Custom Menu Items | Multiple | Select a menu. Menu items are only loaded from the selected parent item and can be further limited by a menu heading. Alternatively, select menu items manually. |
| Custom User | Single | Manually select a user. |
| Custom Users | Multiple | Load all users with a selected user role. |
External Sources
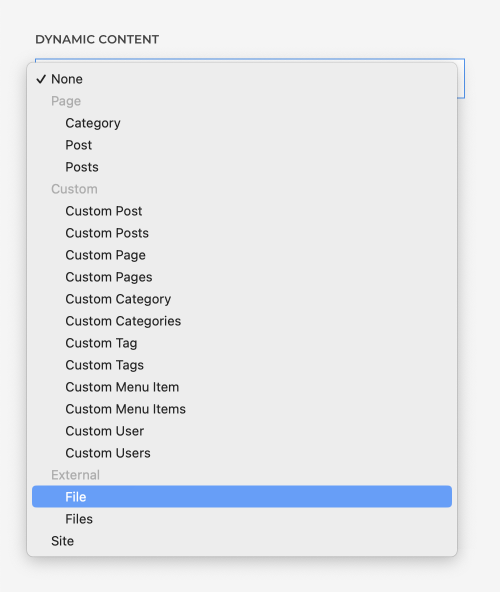
External sources allow you to load custom queried content which is not available in the WordPress database, but comes from the file system. For example, you can load all images from a specific folder. Whenever a new image is added to the folder, it will be automatically displayed in the layout. Just like custom sources, external sources are not divided into separate paginated pages.
Following external sources are available.
| Source | Type | Description |
|---|---|---|
| File | Single | Manually select a file or a folder or load a file by choosing a path glob pattern and setting the offset. For example, specify the file format using files/*.zip or images/*.{jpg,png}. The path is relative to the system folder. To relate the path to the current child theme, use ~theme/*. |
| Files | Multiple | Load all files from a selected folder or set a path glob pattern to filter files. For example, specify the file format using files/*.zip or images/*.{jpg,png}. The path is relative to the system folder. To relate the path to the current child theme, use ~theme/*. |
Site Source
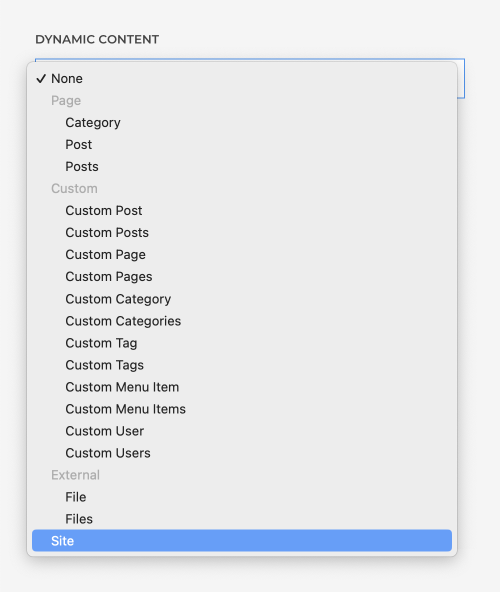
The site source allows you to load general fields of your site, fields of the current logged in user as well as fields of the HTTP request like the URL.
Site sources can also be used in combination with display conditions to show or hide elements depending on different conditions. For example, show specific greetings for a guest user or a logged in user or show elements on a specific URL.
To show or hide an element depending on whether it's a guest user or a logged in user, use the Guest User field under display conditions. For example, to show a greeting for guest users, set the display condition Guest User to Is not Empty, and for logged in users, set it to Is Empty.
To show or hide an element depending on the HTTP request, use one of the Request fields under display conditions. For example, to show different headlines when linking to the same category page but with a different post order, like Latest Posts and Popular Posts, set the display condition URL to Contains using the correct value like orderby=popularity, Itemid=220. To match multiple values, use regular expressions. For example, match two menu item ids /Itemid=(220|250)/ in the URL query, or for SEO-friendly links, use /new-in|bestsellers/ to match strings in the URL path.
Note The regular expression has to be enclosed between slashes, for example, /ab+c/. Learn more about regular expressions in the PHP Regular expressions documentation. The best place to test regular expressions is Regex101.
Parent Source
Content sources set on a section, row, column or element can be used as a parent source in their child nodes. For example, a content source set on a section can be used in the elements within. Only the content source from the closest parent node is available as a parent source. A parent source can be a single or a multiple items source. The selected source will be shown in parenthesis.
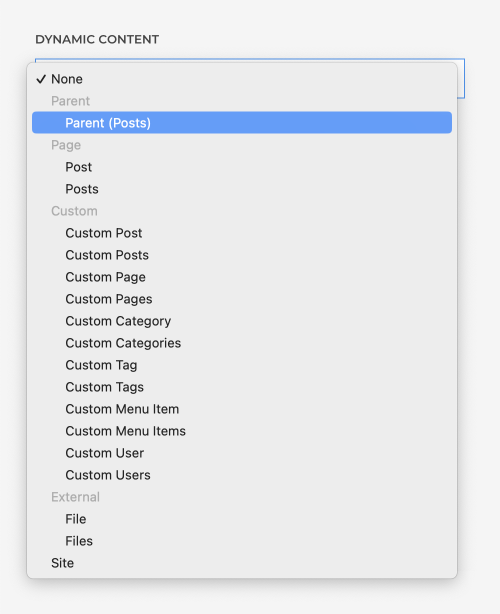
Using parent sources has several benefits. First, the source only needs to be set once and not for each element separately. Additionally, parent sources decrease the number of database queries which improves the overall page speed. And finally, they allow loading a related multiple item source within a multiple item source.
The dynamic content p status icon indicates that a section, row, column or element loads a parent source and a pn status icon indicates that it is a parent multiple items source.
Multiplication
If a section, row, column, element or item has selected a content source with multiple items, it will be multiplied and rendered as many times as available in the content source. For example, the Grid element will render as many items as available in the content source set on the Grid items.
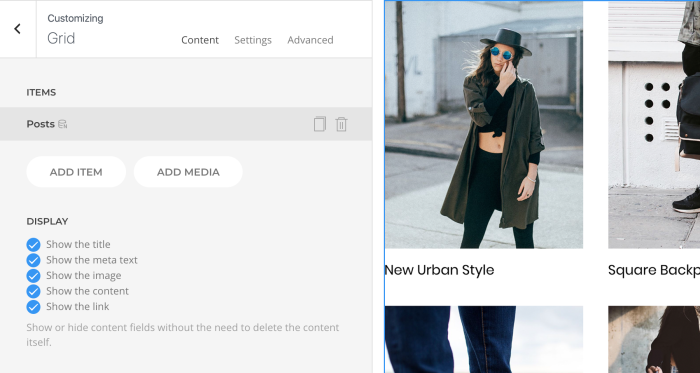
Multiple items elements have a large variety of settings to achieve different layouts. But for more advanced layouts, more flexibility may be needed. Design a repeated layout part with the page builder by multiplying a section, row or column. Simply set a multiple items source on a section, row or column and use it as a parent source in the elements within.
Sections, rows, columns or elements which load a multiple items source show a dynamic content n status icon and are highlighted green in the layout.
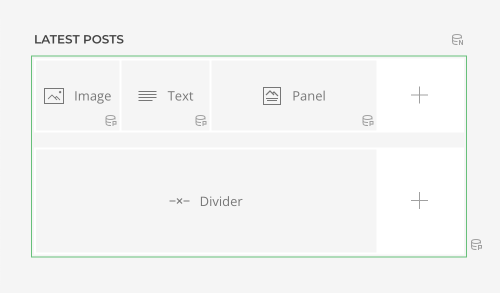
Note Mind that multiplied sections have the same background, which is why the top or bottom padding has to be removed to prevent double padding.
Note When multiplying a single column, the other columns defined by the row layout are still present. That is why, for a layout with just one repeating column, the row layout has to be set to Whole. Set the width for the multiplied column by editing the layout. This defines the number of columns after which they wrap into the next line. Of course, in advanced cases, different columns can be multiplied using a row layout with more columns.
Note To multiply a group of rows, use the sublayout element. Simply set a multiple items source on the element and use it as a parent source within the sublayout.
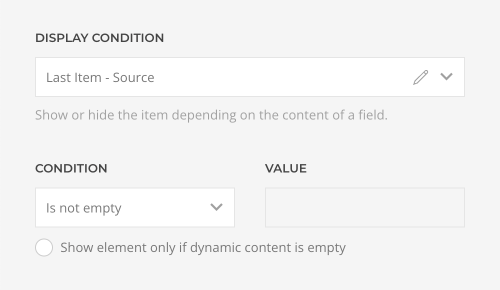
To show or hide an element depending on index of the item, use the First Item, Last Item and Item Index fields under display conditions. For example, show a Divider element only between items. Set the display condition Last Item to Is Empty to hide the last rendered divider.
Start and Quantity
If you select a content source which has multiple items, there are two options available to define which items are rendered.
| Option | Description |
|---|---|
| Start | Set the starting point. If the value is 1, it starts with the first item. |
| Quantity | Limit the number of items. This option is disabled for elements which can only render a single item. |

The combination of the Start and Quantity options allows you to split content source items into different visual layout parts. For example, you can show the first post more prominently than the rest of the posts.
Note When templating an index or a category page, the Quantity option should only be used when splitting content sources. This is because the number of posts on those pages is already defined in WordPress.
Order and Direction
Custom and related sources have additional options to order their items. Mind that the item order of page sources are defined by WordPress. Depending on whether the custom source is a post, category, tag or a user, there are different order options available.
| Order | Description |
|---|---|
| Date | Order by published date. |
| Modified | Order by modified date. |
| Alphabetical | Order alphabetically. |
| Hits | Order by hits. |
| Author | Order by author. |
| Post Order | Order by the post order using the Post Types Order plugin. |
| Random | Order randomly. |
| Custom Fields | Order by any custom field. |
Set the order direction of the items.
| Direction | Description |
|---|---|
| Descending | Start with the last item. |
| Ascending | Start with the first item. |

Related Sources
A content source can have related sources, for example the post has a related author and tags. Their content is available together with the content of the selected content source. In the field mapping UI each related source is shown with a link to drill down to its content fields, for example click Author → to access all author fields.
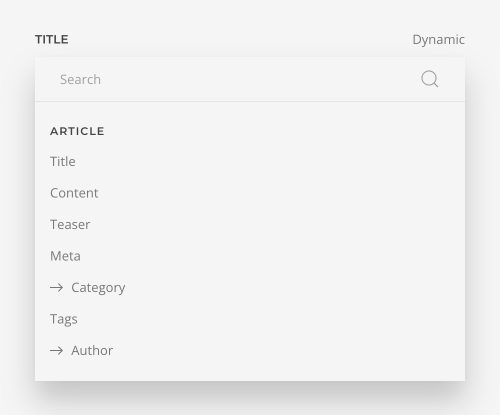
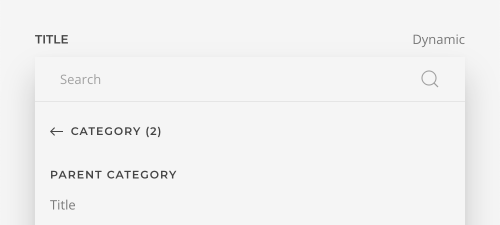
Relationships can be drilled-down across multiple levels, enabling field mapping from deeply nested structures. For example, moving from an article to its category and then to the parent category to access its fields.
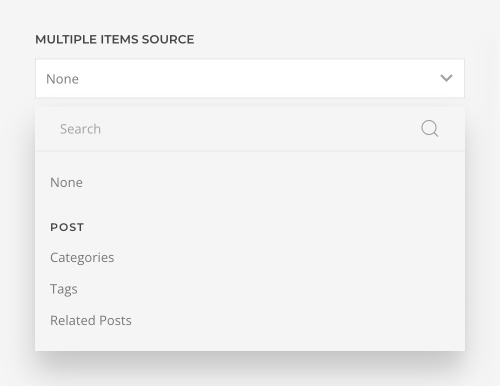
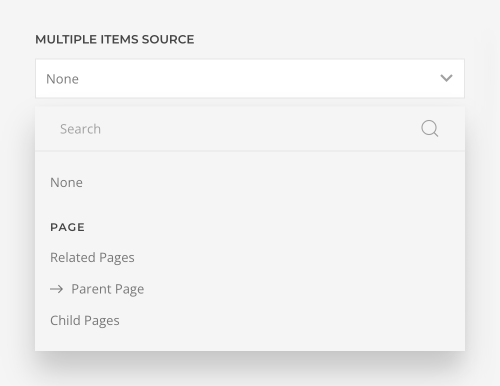
Related content sources with multiple items, like post tags, are available under the Multiple Items Source option.
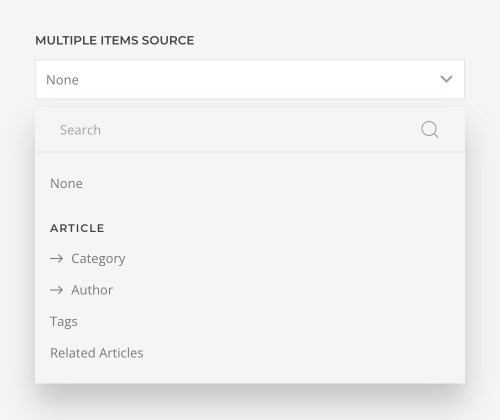
Note The Multiple Items Source option is only available if the selected content source is a single content source. This is because it is not possible to render a related multiple item source within a multiplied item source in the same element. However, the option is available if a multiple items source is used as a parent source which makes its items single content sources. This is because if a section, row or column renders the multiple items source, the element can render a related multiple items source. For example, render a list of categories with their latest posts. Elements or their items which load a parent multiple items source show a dynamic content pn status icon and are highlighted green in the layout.
Related Sources for Posts
Following related content sources are available for a post.
| Related Source | Type | Description |
|---|---|---|
| Author | Single | The post author |
| Categories | Multiple | The categories the post belongs to |
| Tags | Multiple | The tags the post belongs to |
| Related Posts | Multiple | Related post of the current post, for example posts with the same term. Current post is always excluded. |
Related Posts Source
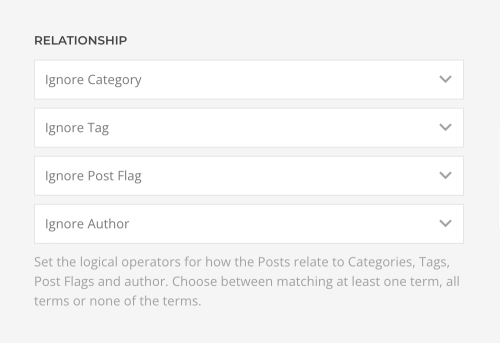
Related posts have additional filter options to define their relationship. Set the logical operator for how the posts relate to categories, tags, post flags and author. For example, show related posts from the same category and written by the same author. Choose between matching at least one term, all terms or none of the terms. The current post will be excluded.
Related Sources for Pages
Following related content sources are available for a page.
| Related Source | Type | Description |
|---|---|---|
| Author | Single | The page author |
| Parent Page | Single | The parent page and all parent pages with related pages and child pages |
| Related Pages | Multiple | Related page of the current page, for example pages with the same author. Current page is always excluded. |
| Child Pages | Multiple | Child pages of the current page |
Related Pages Source
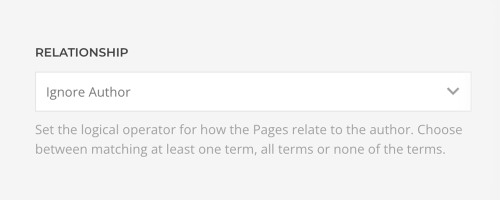
Related pages have additional filter options to define their relationship. Set the logical operator for how the pages relate to the author. Choose between matching, not matching or ignoring the author. The current page will be excluded.
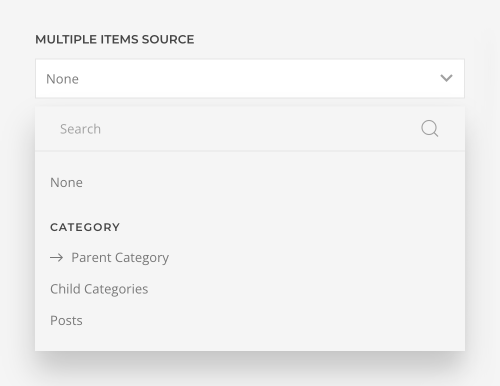
Related Sources for Categories
Following related content sources are available for a category.
| Related Source (Category) | Type | Description |
|---|---|---|
| Parent Category | Single | The parent category of the category with all parent categories |
| Child Categories | Multiple | The child categories of the category and all parent categories with their child categories and posts |
| Posts | Multiple | Posts of the category. Optionally, include posts from child categories. |
Related Sources for Tags
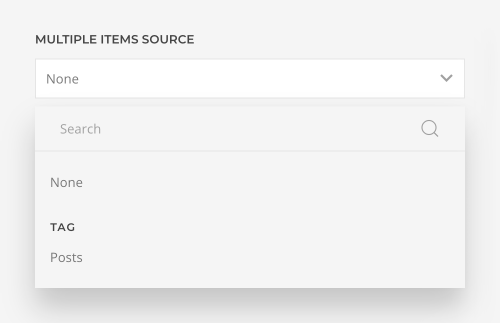
Following related content sources are available for a tag.
| Related Source | Type | Description |
|---|---|---|
| Posts | Multiple | The posts of the tag |
Related Sources for Menu Items
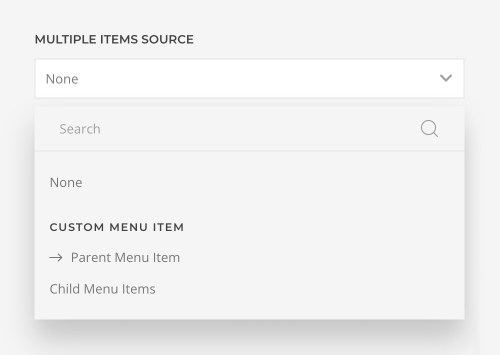
Following related content sources are available for a menu item.
| Related Source (Menu Item) | Type | Description |
|---|---|---|
| Parent Menu Item | Single | The parent item of the menu item with all parent items |
| Child Menu Items | Multiple | The child items of the menu item and all parent items with their child menu items |
Date Filter
Custom and related sources have additional options to filter their items depending on any date field, including custom fields. Choose between a range relative to the current date, fixed start and end dates or a custom format range.
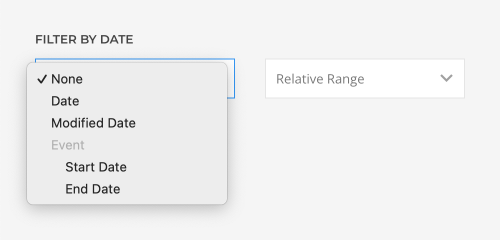
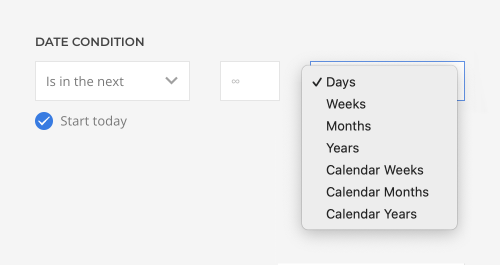
Set a date range relative to today — this can be any number of days, weeks, months or years in the future or past. For example, show events in next 30 days starting tomorrow or from the last 30 days starting yesterday. Optionally, include today in the range. Alternatively, use full calendar periods, which means the whole week, month, or year. For example, if today is mid-June, show the upcoming events in July. Starting today will include the current partial period, which are the remaining events in June.
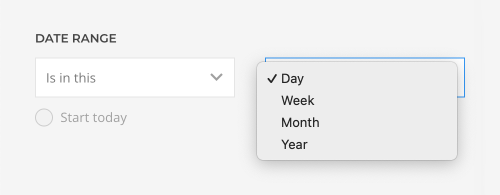
Or show events from the current day, week, month or year.
Choose a fixed date range to display content from a specific time frame, like movies from 2015. Set only one date to load all posts either before or after that date.

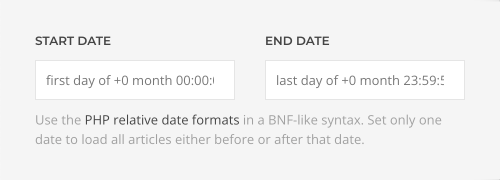
Use custom format ranges with PHP relative date formats in a BNF-like syntax for advanced date filtering. This allows setting dynamic date offsets, for example, to display all posts from a specific month in the future. Using this filter makes it possible to group events by month for a year ahead.
| Start | End | Description |
|---|---|---|
first day of +0 month 00:00:00 |
last day of +0 month 23:59:59 |
This month |
first day of +1 month 00:00:00 |
last day of +1 month 23:59:59 |
Next month |
first day of +2 month 00:00:00 |
last day of +2 month 23:59:59 |
Month after next month |
| … | … | … |
first day of +11 month 00:00:00 |
last day of +11 month 23:59:59 |
11th month from today |
Field Mapping
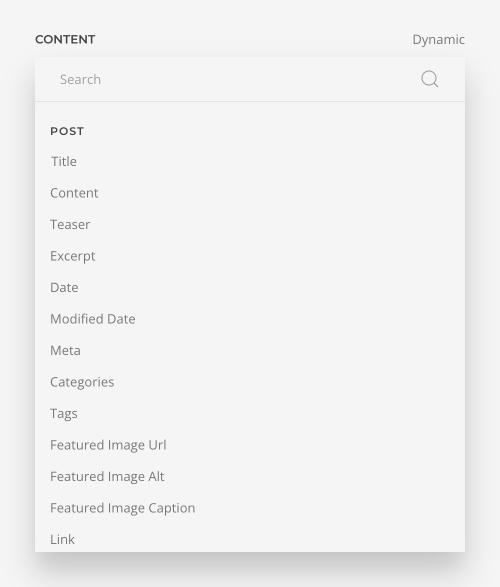
Once a content source is selected, its fields are available for mapping. To map a content field to an element's field, open the Content tab of an element. Each element field shows a Dynamic button on the right which opens a dropdown with a list of all available content fields.

Select the content field to map it to the element's field. For example, you can map the post’s title and featured image to the title and image fields of the Panel element. Use the search to easily find the needed field.
Instead of the former field, the dynamic field is shown with its name and source.

The following actions are available.
| Action | Description |
|---|---|
| Dynamic Button | Open a dropdown with all content fields available for mapping. |
| Edit Icon | Open the available field options. |
| Delete Icon | Remove the field mapping. The former field is shown again. |
Content Fields
YOOtheme Pro can load fields from a Page, Post, Category, Tag, User, Attachment as well as any custom post type and taxonomy. Custom fields from third-party plugins are available for mapping as well. While most fields like title, date or an image simply render their content, some fields are pseudo-fields, which means there is no actual field to fill out. Their content is provided by WordPress or depends on different fields.
| Pseudo-fields | Description |
|---|---|
| Teaser | Render the intro text if the more tag is present, otherwise the whole post content. There is an option to prefer the excerpt over the intro text and disable the content fallback. |
| Meta | Render the date, author and comment count fields as well as a term list of categories or tags in a formatted string. Author, comment count and terms are automatically linked to their pages. |
| Categories | Render a comma-separated list of all categories which are automatically linked to their category page. |
| Tags | Render a comma-separated list of all tags which are automatically linked to their tag page. |
| Link | Render the link to the item's page. |
| Active | Returns the active state of a menu item, category, or tag for the current page. |
Important Mind that the Content and Teaser fields should only be mapped on templates and not on individual page layouts. This is because these fields are used to store the actual page content and the builder layout itself.
Field Options
There are several options available to manipulate the content of a field. Some field types have additional options.
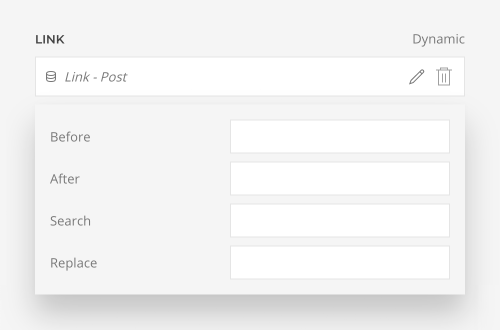
Note The order in which the options are applied is: Date Format → Content Length → Search and Replace → Before and After
Before and After
All fields have options to add text before and after their content.
| Option | Description |
|---|---|
| Before | Add text before the field value. For example, if it's an email address, for example info@example.com, and you add mailto: to the Before option, the created link mailto:info@example.com, will open the user's email program. |
| After | Add text after the field value. For example, if it's a pricing number, for example 20, and you add a unit like € to the After option, the price 20€ will be displayed in your layout. |
Note Text in the Before and After fields can be translated by using the WPML String Translation plugin.
Search and Replace
All fields have options to perform a search and replace on their content. This is very powerful and allows advanced manipulation of the field content.
| Option | Description |
|---|---|
| Search | Select a predefined search pattern or enter a custom string or regular expression to search for. The regular expression has to be enclosed between slashes. For example, enter my-string as a custom string, or /ab+c/ as a regular expression. |
| Replace | Enter the replacement string which may contain references. If left empty, the search matches will be removed. |
The predefined URL Protocol pattern (/https?:\/\//) will remove the HTTP/HTTPS protocol from a URL, if the replacement string is left empty. For example https://yootheme.com will convert to yootheme.com. This pattern allows you to link to an external page and display a shortened URL with just one custom field.
Learn more about search and replace in the PHP preg_replace function documentation and about regular expressions in the PHP Regular expressions documentation. The best place to test regular expressions is Regex101.
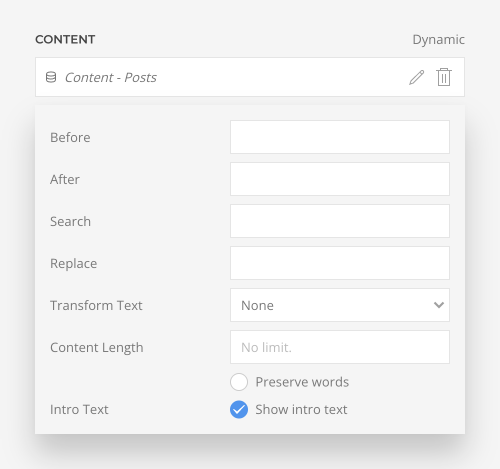
Transform Text and Content Length
Text fields have additional options to transform text and limit the content length.
| Option | Description |
|---|---|
| Transform Text | Select the predefined transform pattern. Choose between uppercase, lowercase and title case. |
| Content Length | Limit the content length to a number of characters. All HTML tags will be stripped. Optionally, preserve words when limiting the content length. |
Date Format
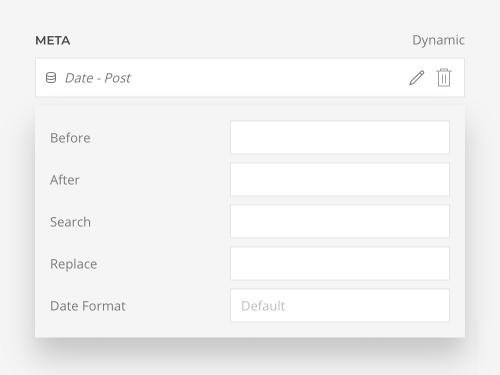
Date fields have an additional option to format the date.
| Option | Description |
|---|---|
| Date Format | Select a predefined date format or enter a custom format, for example M j, Y (Aug 6, 1999) or m/d/Y (08/06/1999). |
Learn more about it in the PHP Date function documentation.
Content Field
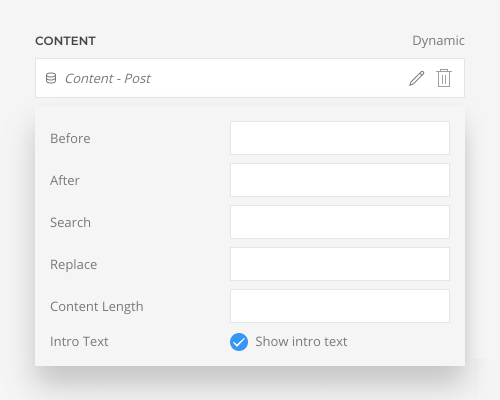
The content field has an additional option to render the content without the intro text if the more tag is present.
| Option | Description |
|---|---|
| Intro Text | Show or hide the intro text. |
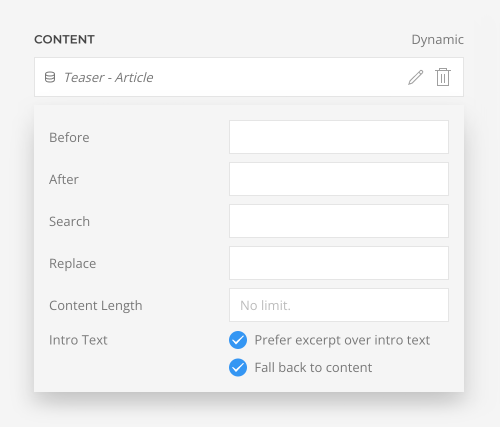
Teaser Field
The teaser field has an additional option to prefer the excerpt over the intro text and disable the content fallback to prevent the content from being shown twice if there is no intro text.
| Option | Description |
|---|---|
| Excerpt | Prefer excerpt over the intro text. |
| Content | Fall back to content. |
Meta Field
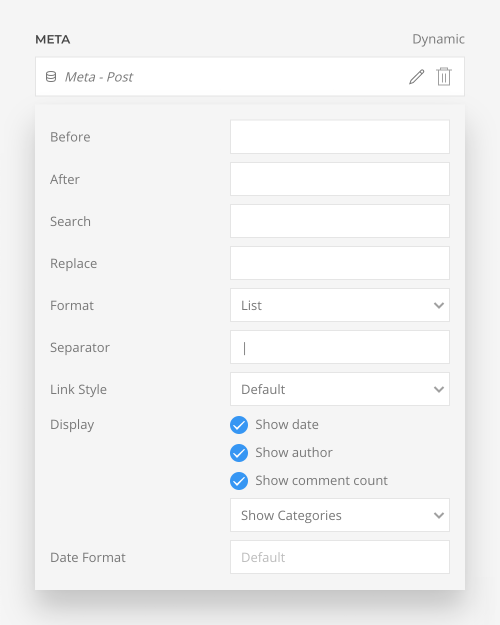
Meta fields have additional options to display their content.
| Option | Description |
|---|---|
| Format | Display the meta text in a sentence or a horizontal list. |
| Separator | Set a separator between fields if the format is a list. |
| Link Style | Set the link style. |
| Display | Show or hide fields in the meta text. Additionally, you can choose from which taxonomy the term list is shown. |
| Date Format | Select a predefined date format or enter a custom format, for example M j, Y (Aug 6, 1999) or m/d/Y (08/06/1999). |
Categories and Tags Fields
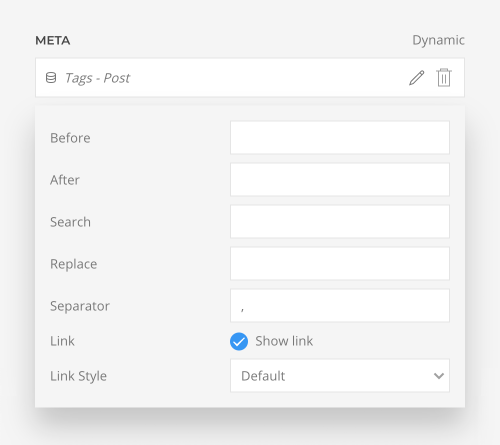
Categories and tags fields have additional options to display their content.
| Option | Description |
|---|---|
| Separator | Set a separator between categories or tags. |
| Link | Show or hide linking categories or tags. |
| Link Style | Set the link style. |
Avatar Field
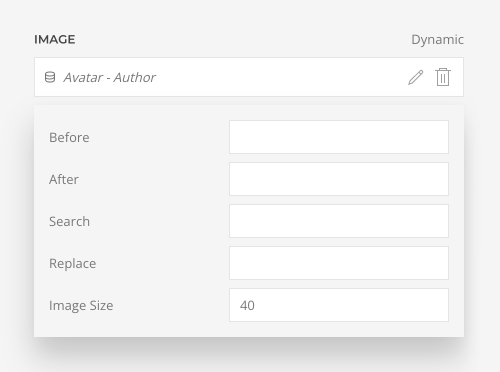
The user avatar field has an additional option for the Gravatar image size.
| Option | Description |
|---|---|
| Image Size | Set the size for the Gravatar image in pixels. |
Custom Fields
YOOtheme Pro supports custom fields created with the Advanced Custom Fields or the Toolset plugin. It can load custom fields from a Page, Post, Category, Tag and User as well as any custom post type and taxonomy.
Custom fields which contain a single item are available for mapping together with the default content fields and are grouped under the field group name.
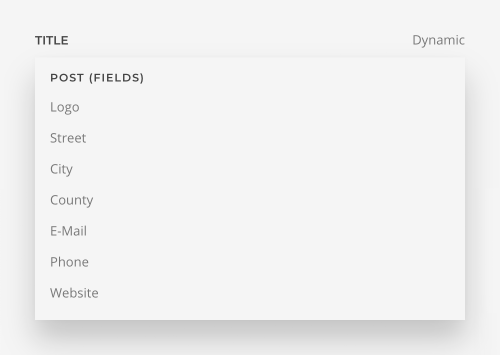
On the other hand, custom fields with multiple items have to be selected under the Multiple Items Source option. They are grouped under the field group name.
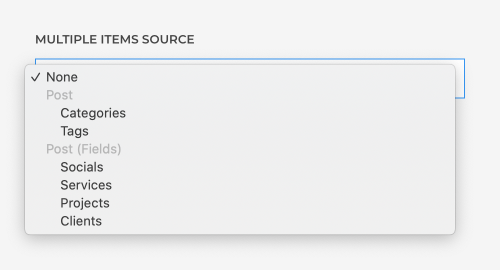
Advanced Custom Fields
To add custom fields with Advanced Custom Fields, create a new field group. Set a rule under Location to determine which content type will use the custom fields. YOOtheme Pro only supports rules for Post Type (Post) , User Form (User) or Taxonomy (Forms). Add a custom field by clicking Add Field. Learn more in the ACF documentation.
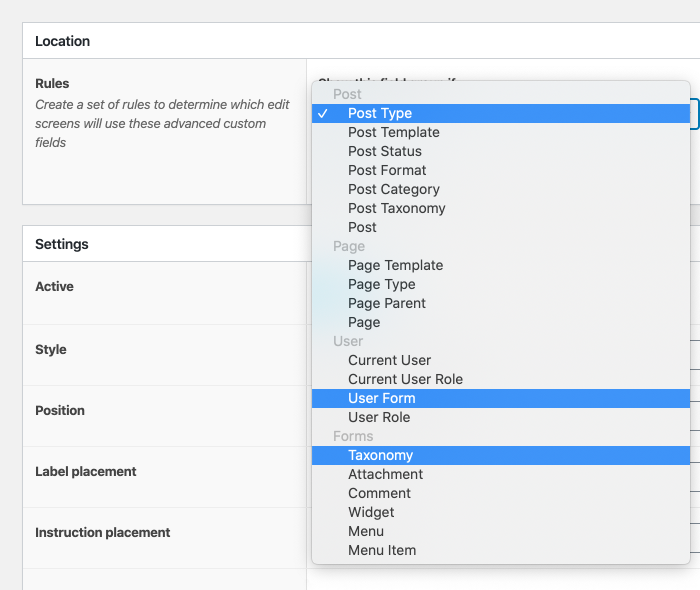
Following custom fields are supported.
| Name | Type | Description | Documentation |
|---|---|---|---|
| Text | Single | Input field | View |
| Text Area | Single | Textarea field | View |
| Number | Single | Input number field | – |
| Range | Single | Input range field | View |
| Single | Input field | – | |
| Url | Single | Input field | – |
| Password | Single | Password input field | – |
| Image | Single | Media picker field providing title and url |
View |
| File | Single | Media picker field providing all File fields | View |
| Wysiwyg Editor | Single | WYSIWYG editor field | View |
| oEmbed | Single | Input field which generates markup to embed content | View |
| Gallery | Multiple | Media picker field providing all Attachment fields | View |
| Select | Single/Multiple | Select field providing label and value |
View |
| Checkbox | Multiple | Checkbox field providing label and value |
View |
| Radio Button | Single | Radio field providing label and value |
View |
| Button Group | Single | Button group field providing label and value |
View |
| True / False | Single | Checkbox field providing a boolean | View |
| Link | Single | Link picker field providing title and url |
View |
| Post Object | Single/Multiple | Post picker field to create relationships | View |
| Page Link | Single/Multiple | Page link picker field | View |
| Relationship | Multiple | Advanced post picker field to create relationships | View |
| Taxonomy | Multiple | Checkbox field providing all Taxonomy fields | View |
| User | Single/Multiple | Select field providing all User fields | View |
| Google Map | Single | Location picker field providing all Google Maps fields | View |
| Date Picker | Single | Date picker field | View |
| Date Time Picker | Single | Date and time picker field | View |
| Time Picker | Single | Time picker field | View |
| Color Picker | Single | Color picker field | View |
| Repeater | Multiple | Repeat a customizable set of fields | View |
Important The Post Object and Relationship fields are only available for mapping if one post type is selected in the Filter by Post Type option.
Note The Gallery and Repeater fields are only available in the Advanced Custom Fields Pro plugin. The Flexible Content field is not supported.
Some fields, like the Repeater field, have an option to allow users to select one or multiple items. Depending on the option, the field will be available for mapping together with the default content fields or has to be selected under the Multiple Items Source option.

Relationships
The Post Object and Relationship fields are used to create relationships between posts. They add a custom field to select single or multiple related posts. They are available for mapping as a related content source, including all their fields and related sources.
To create a bidirectional relationship which connects posts both ways, keeping related content synced automatically, enable the Bidirectional option on both fields and select the corresponding target fields. When a related post is picked in one field, it's also saved in the other.
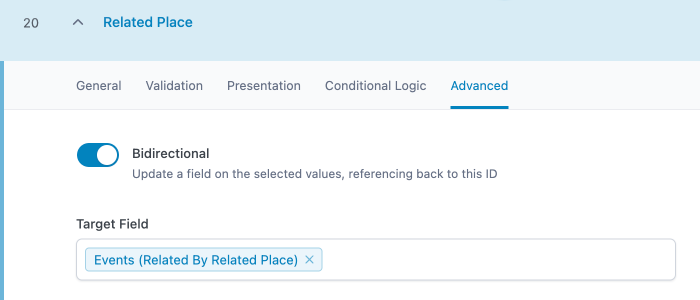
Toolset
To add custom fields with Toolset, choose the Post Type and click Add custom fields. Learn more in the Toolset documentation.
Following custom fields are supported.
| Name | Type | Description |
|---|---|---|
| Audio | Single/Multiple | Media picker field |
| Checkboxes | Multiple | Checkbox field |
| Checkbox | Single | Checkbox field |
| Colorpicker | Single/Multiple | Color picker field |
| Date | Single/Multiple | Date picker field |
| Single/Multiple | Link picker field | |
| Embedded Media | Single/Multiple | Input field which generates markup to embed content |
| File | Single/Multiple | Media picker field |
| Image | Single/Multiple | Media picker field |
| Number | Single/Multiple | Input field |
| Phone | Single/Multiple | Input field |
| Radio | Single/Multiple | Radio field |
| Select | Single | Select field |
| Skype | Single/Multiple | Input field |
| Multiple Lines | Single/Multiple | Input field with multiple lines |
| Single Line | Single/Multiple | Input field with a single line |
| Url | Single/Multiple | Link picker field |
| Video | Single/Multiple | Media picker field |
| Wysiwyg | Single | WYSIWYG editor field |
| Post Reference | Single | Post picker field to create relationships |
Some fields, like the Image field, have an option to allow users to select one or multiple items. Depending on the option, the field will be available for mapping together with the default content fields or has to be selected under the Multiple Items Source option.

Relationships
The Post Reference field is used to create a one-to-many relationship between posts. It adds a custom field to select a single related post. In addition to this custom field, Toolset allows you to create a Relationship in a dedicated relationship manager. Choose between One-to-one, One-to-many and Many-to-many relationships and even add custom fields specifically for the relationship. In both cases, the connected posts are available for mapping as a related content source, including all their fields and related sources.
In Toolset only Relationships are bidirectional and connect posts both ways, keeping related content synced automatically. This means when a related post is picked on one side, it's also connected on the other.
Custom Post Types
By default, WordPress comes with a few different post types, for example pages and posts. Posts have their own taxonomies, namely categories and tags. To better group and manage your content in the WordPress administration, you can register new custom post types with their own taxonomies. For example, if your website does movie reviews, you can create a custom post type called Movie.
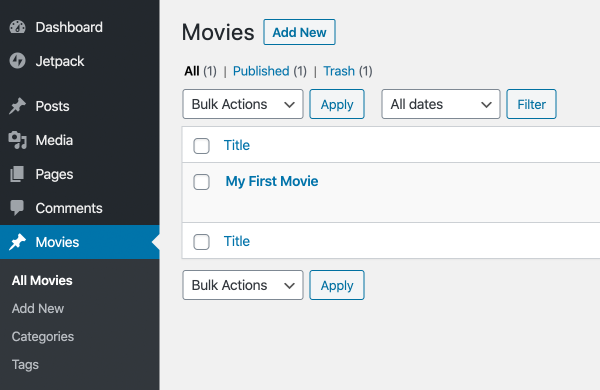
YOOtheme Pro fully supports registered custom post types and taxonomies. This means you can use the YOOtheme Pro page builder to create individual layouts for a custom post type or to create templates for their index, archive and single post pages and map their fields and custom fields into your builder layouts. Custom post types and their taxonomies are available as page and custom sources and can be used in the same way as the WordPress default post types.
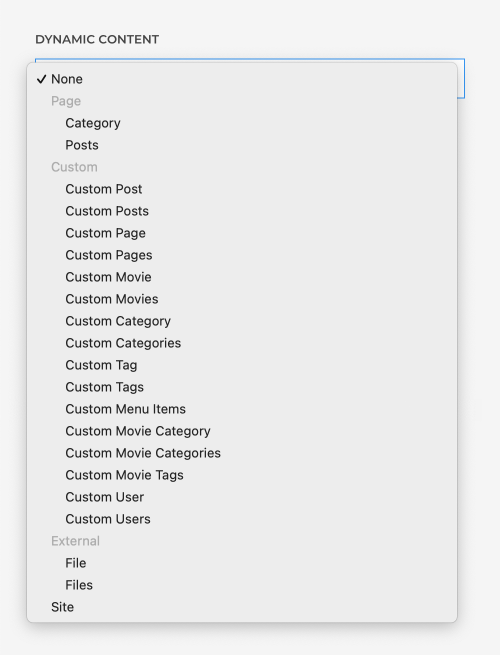
Note Some pages can contain different post types in their page source. Since post types usually have different fields, you need to decide which fields will be available for mapping. This is why the page source Items is available multiple times. It contains the same items from all post types. This applies to the date and author archives, the search as well as to taxonomy archives if they are shared across post types.
Important By default, the author archive page does not show custom post types. Find descriptions on the web on how to alter the query in the pre_get_posts hook to extend it with custom post types.
We recommend the following WordPress plugins to use with YOOtheme Pro when working with custom post types and taxonomies.
| Name | Description | Website |
|---|---|---|
| Custom Post Type UI | Easily register and manage custom post types and taxonomies. | View |
| Toolset | Easily register and manage custom post types and taxonomies. | View |
Custom Post Type UI
With the Custom Post Type UI plugin you can easily register and manage custom post types and taxonomies. Open CPT UI in the WordPress administration menu, click Add/Edit Post Types and add a new post type by entering a Post Type Slug, for example movie, as well as Plural Label and Singular Label.
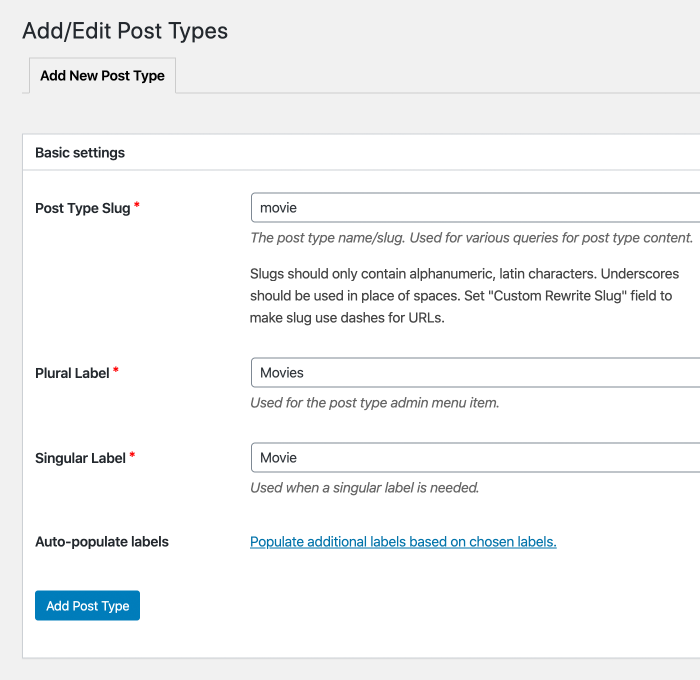
If the custom post type requires an index page for all its posts, set the Has Archive option to TRUE. It will allow you to apply templates to the Post Type Archive page of your custom post type.

To create a new taxonomy, click Add/Edit Taxonomies and add a new taxonomy by entering a Taxonomy Slug, for example categories, Plural Label and Singular Label. Then attach your taxonomy to your created custom post type.
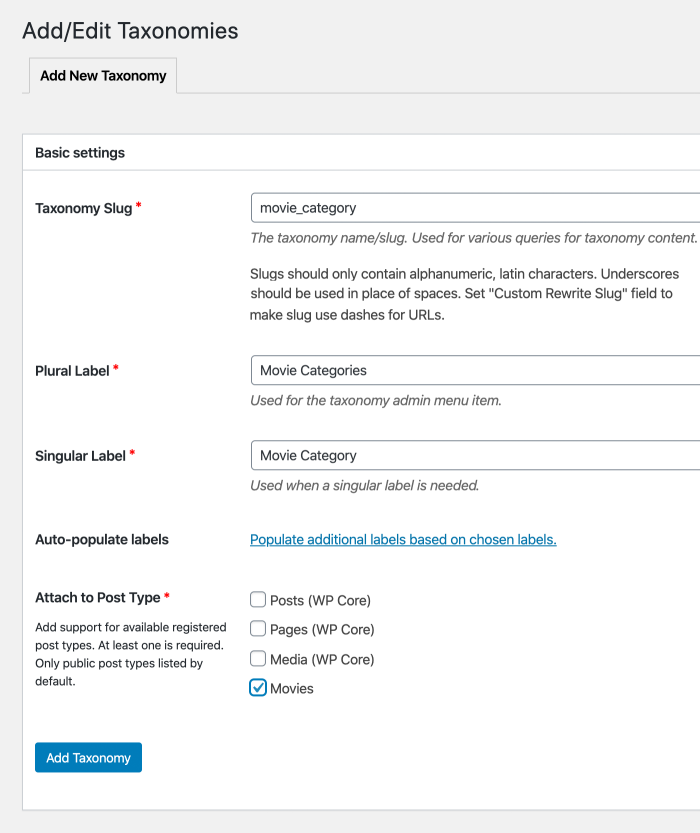
If the taxonomy requires parent-child relationships, set the Hierarchical option to TRUE.

Invalid Sources and Fields
There are cases in which content sources or mapped fields are invalid. For example, templates loaded from the layout library can use content sources or fields which don't exist in the current WordPress site. Or content sources or fields could also be deleted or renamed in WordPress but still be used in the layout.
Here is a list of all cases when a content source or a field is invalid.
- A selected page source doesn't exist on the current page.
- A selected custom source doesn't exist in the WordPress installation.
- A mapped field doesn't exist in the selected content source.
- A content source is selected but none of its fields are mapped.
Invalid content sources and fields are highlighted red. To quickly find those cases, the dynamic content status icon is also highlighted red in the YOOtheme builder.

Display Condition
Use conditional logic to display an element depending on a field of a chosen content source. For example, display conditions can be used to hide a Headline element if the following Grid element has no content items or show posts which have an image differently to posts without an image.
Once a content source is selected, its fields are available under Display Condition. Pick a field to which the condition should apply. Once a field is set, additional field options are available to manipulate the content of a field. This is especially useful for date fields where custom date format can be applied to simplify the condition.

Set a condition, and the element will only be displayed if the condition is met. Some conditions require a value for comparison.

| Condition | Description |
|---|---|
| Is empty | The content of the field is empty |
| Is not empty | The content of the field is not empty |
| Is equal to | The content of the field is equal to the entered value |
| Is not equal to | The content of the field is not equal to the entered value |
| Contains | The content of the field contains the entered value |
| Does not contain | The content of the field does not contain the entered value |
| Less than | The content of the field is less than the entered value |
| Greater than | The content of the field is greater than the entered value |
| Starts with | The content of the field starts with the entered value |
| Does not start with | The content of the field does not start with the entered value |
| Ends with | The content of the field ends with the entered value |
| Does not end with | The content of the field does not end with the entered value |
| Matches a RegExp | The content of the field matches the entered regular expression |
Learn more about the conditions in the PHP comparison operators documentation. Note that the string comparisons are case-sensitive.
Additionally, there is an option to only show an element if dynamic content is empty, for example, to show a different headline if there are no search results.
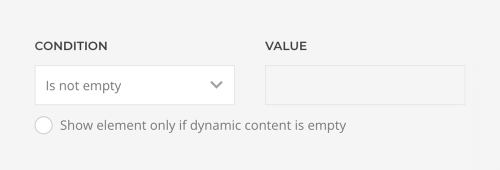
Note Display conditions are not used to query a custom content source yet. They are only applied to the already queried content sources.
Note The regular expression has to be enclosed between slashes, for example, /ab+c/. Learn more about regular expressions in the PHP Regular expressions documentation. The best place to test regular expressions is Regex101.
Third-Party Integration
YOOtheme Pro has additional support for the following plugins which add more functionalities to your website.
Post Types Order
With the Post Types Order plugin you can order posts and post type objects using drag and drop. In YOOtheme Pro the Post Order is available when setting the order for custom sources.
Category Order and Taxonomy Terms Order
With the Category Order and Taxonomy Terms Order plugin you can order categories and all custom taxonomies terms using drag and drop. In YOOtheme Pro the Term Order is available when setting the order for custom sources.
WordPress Popular Posts
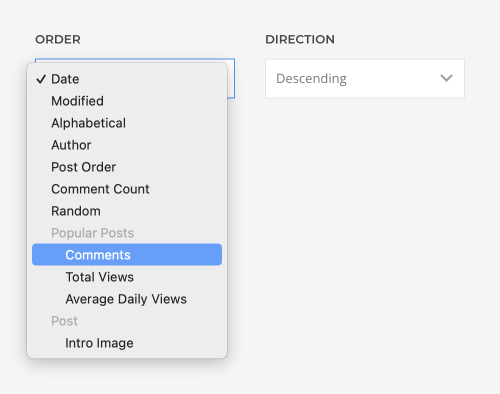
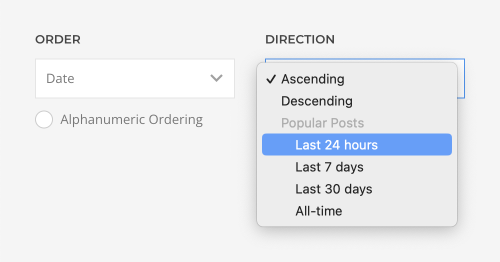
With the WordPress Popular Posts plugin you can order posts, pages and custom post types by the number of views or comments. This allows you to display your most popular posts.
To allow custom post types also to be ordered by popular posts, click the settings icon in the upper left. Add the name of your custom post type in singular, for example, if your custom post type is Movies, add movie after post,page.
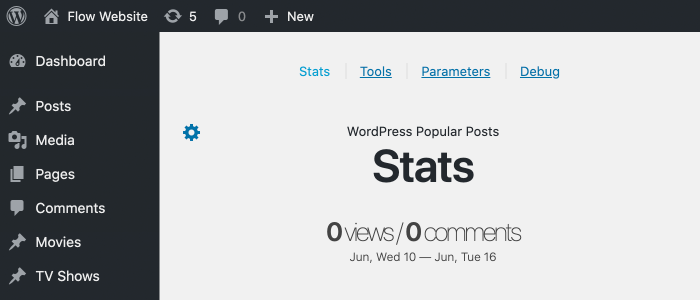
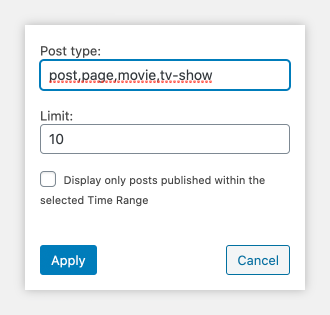
Popular Posts ordering will be available for posts, pages and custom post types selected as custom sources or related sources as option group under order and direction.
| Option | Description |
|---|---|
| Order | Order posts by comments, total views or average daily views. |
| Direction | Set the time range for sorting to last 24 hours, last 7 days, last 30 days or all-time. |
