Installation
This is a short instruction on how to install ZOO or ZOO + Demo content extension in your Joomla installation.
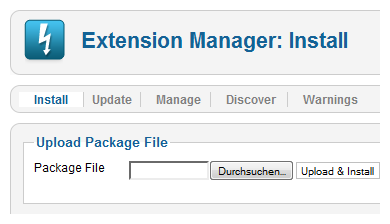
Install via Upload

To install ZOO use the Extensions Installer in the Joomla administration. Go to Extensions » Install/Uninstall.
Important When you are facing an error during installation, it is highly recommended trying to Install from directory
Install From Directory
- Download the latest ZOO version and unpack all ZOO files to a directory on your pc.
- Using FTP, upload this directory to the
/tmpdirectory of your Joomla installation on your webserver. - Go to the extensions installer in the Joomla administration, use the "Install from Directory" option to set the directory of your uploaded ZOO files.
- Click on the Install button and Joomla will install it from the given directory.
Requirements
- Joomla 3.x+
- PHP 5.3.10+
- PHPs GD extension (enabled in PHP 5.0+)
- PHPs SimpleXML extension (enabled in PHP 5.0+)
- PHPs DOM extension (enabled in PHP 5.0+)
- PHPs allow_url_fopen support (enabled in PHP 5.0+)
- PHPs cURL extension - is needed for Facebook Connect to work.
- MySQL 5.1+ (MSSQL is not supported)
- We recommend Apache 2.x + with mod_mysql, mod_xml and mod_zlib. Minimum requirement 1.3
- Mod_rewrite for Apache for search engine friendly links